Progression
Maps
Every kingdom’s map with all of its zones, the tool that opens each blocked area, where that tool is sold and what it costs, and where the Goddess and Lost Goddess Statues stand. Pick a kingdom, then hover or tap a zone. Drag the map to move it, pinch or scroll to zoom, and open it full screen on a phone; the mark-size slider under each map makes the statues and gathering spots bigger or smaller. The area unlocks page lists every single blocker instead, with its cell and the level, rank, Power and Affinity gates.
What each tool opens
Having a kingdom is not having its zones. Besides the level gates, some zones are shut by the kingdom’s own obstacle, and only the tool for it gets you in, however high your level. Each kingdom’s shop sells its own tool for 3,000 of that kingdom’s currency: one per slot at shop levels 1 and 2, then as many as you want from shop level 4. The Gateway Key is sold in every kingdom at shop levels 3 and 4, and the key vaults also hold one or two lying about. The tools carry over between kingdoms: Cinder Ridge has vine zones that want Verdantglade’s potion, and Harpadia has boulder and coral zones. Buy the tool before you count those zones as open; the bed-XP post says why it pays to open them before you log off.
| Tool | Opens | Sold in (shop level) | Price | Zones it opens |
|---|---|---|---|---|
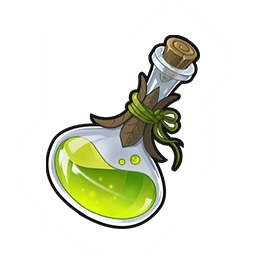 Withering Potion | vines A secret Verdantglade brew that makes overgrown vines simply melt away. | Verdantglade, levels 1 and 2 (two each), level 4 (no limit) | 3,000  Abundance Leaf | Verdantglade 6, Cinder Ridge 3, Aqualis 2, Loong Haven 1 |
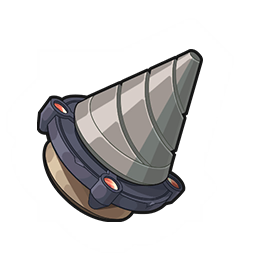 Magic Drill | boulders This magical mining implement now serves a new purpose: blasting through boulder blockades. | Cinder Ridge, levels 1 and 2 (two each), level 4 (no limit) | 3,000  Alloy Gear | Verdantglade 3, Cinder Ridge 5, Aqualis 3, Loong Haven 1, Aethyris 2, Harpadia 2 |
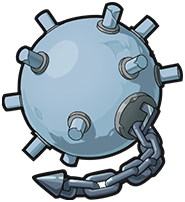 Water Mine | coral Simple but powerful. One splash of this underwater explosive clears any coral in its path. | Aqualis, levels 1 and 2 (two each), level 4 (no limit) | 3,000  Shimmer Scale | Cinder Ridge 3, Aqualis 6, Loong Haven 2, Aethyris 2, Harpadia 2 |
 Cloud Jade | cloud bridge A magical jade that lets you walk on clouds in special areas. | Loong Haven, levels 1 and 2 (two each), level 4 (no limit) | 3,000  Blade Coin | Loong Haven 7, Aethyris 2 |
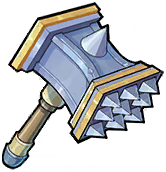 Purifying Hammer | chaos crystals A hammer imbued with purifying power. Can crush chaos-forged crystals. | Aethyris, levels 1 and 2 (two each), level 4 (no limit) | 3,000  Aethyrine Crest | Aethyris 5 |
 Brick Switch | brick bridge A mysterious switch that instantly builds a walkable brick bridge in Harpadia. | Harpadia, levels 1 and 2 (two each), level 4 (no limit) | 3,000  Points | Harpadia 5 |
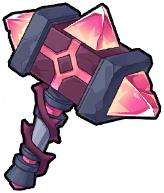 Flame Hammer | ice barrier Infused with Divine Flame to shatter ice barriers. | Ignis, levels 1 and 2 (one), level 4 (no limit) | 3,000  Frostflame Coin | Ignis 3 |
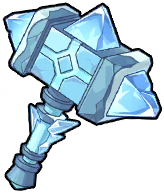 Frost Hammer | magma barrier Infused with Divine Frost to cool magma barriers. | Ignis, levels 1 and 2 (one), level 4 (no limit) | 3,000 Frostflame Coin | Ignis 3 |
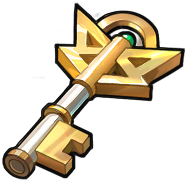 Gateway Key | the sealed stone gates of the key vaults Emergency stone gates have mysteriously sealed off the paths. Only this specially forged key can open them. | every kingdom, levels 3 and 4 (one) | 3,000 Abundance Leaf | Verdantglade 3, Cinder Ridge 4, Aqualis 5, Loong Haven 5, Aethyris 5, Harpadia 5, Ignis 5 |
Zone counts are the zones whose kind in the game’s own zone list is that obstacle, plus the zones where the obstacle itself stands (a Vine Blockade, a Boulder Blockade, a Coral Blockade, a Cloud Bridge, a Chaos Crystal, a Permafrost Cube, a Magma Rock, a Sealing Pillar). The Gateway Key line is from the item’s own description and a players’ guide; the key being spent happens on the server, so that one is reported rather than read.
Legend
North is up, as on the in-game minimap. Hover or tap a zone for its name, kind, tool, statue and gate; tap it again to let go. Names show the numeral of a main-story region and the name of the larger side zones, and the smaller zones get theirs once you zoom in. The ? button on each map shows this legend over the map, and the ⛶ button opens the map full screen.
Verdantglade S1
77 zones: 17 main-story regions, each with a Goddess Statue, and 49 side zones with a Lost Goddess Statue. 12 zones are behind a tool: 6 vine zones (Withering Potion), 3 boulder zones (Magic Drill), 3 key vaults (Gateway Key); 11 of them hold a Lost Goddess Statue. The 75 gathering spots are on the gathering map with their timers; switch them on below to see where they sit.
| Blocked zone | Needs | Statue | Reached at |
|---|---|---|---|
| Jungle Vault | Withering Potion | Lost Goddess Statue (+1% Raw Ore) | behind the level 26 gate |
| Monolith Ruins V | Withering Potion | — | behind the level 22 gate |
| Vine Peninsula | Withering Potion | Lost Goddess Statue (+1% Chrono Sand) | behind the level 22 gate |
| Stagnant Jungle | Withering Potion | Lost Goddess Statue (+1% Battle Essence) | no level gate |
| Sunken Forest | Withering Potion | Lost Goddess Statue (+1% Wood) | behind the level 32 gate |
| Sunrise Isle | Withering Potion | Lost Goddess Statue (+1% Chrono Sand) | no level gate |
| Mushroom Woods | Magic Drill | Lost Goddess Statue (+1% Stone) | behind the level 22 gate |
| Hidden Camp | Magic Drill | Lost Goddess Statue (+1% Rolla) | no level gate |
| Hideout | Magic Drill | Lost Goddess Statue (+1% Raw Ore) | behind the level 22 gate |
| Rabbit Vault | Gateway Key | Lost Goddess Statue (+1% Chrono Sand) | no level gate |
| Gorge Depths | Gateway Key | Lost Goddess Statue (+1% Rolla) | behind the level 26 gate |
| Owl Vault | Gateway Key | Lost Goddess Statue (+1% Stone) | behind the level 30 gate |
Cinder Ridge S1
99 zones: 18 main-story regions, each with a Goddess Statue, and 68 side zones with a Lost Goddess Statue. 15 zones are behind a tool: 3 vine zones (Withering Potion), 5 boulder zones (Magic Drill), 3 coral zones (Water Mine), 4 key vaults (Gateway Key); 15 of them hold a Lost Goddess Statue. The 95 gathering spots are on the gathering map with their timers; switch them on below to see where they sit.
| Blocked zone | Needs | Statue | Reached at |
|---|---|---|---|
| Vine Corner | Withering Potion | Lost Goddess Statue (+1% Rolla) | behind the level 60 gate |
| Vine Wilderness | Withering Potion | Lost Goddess Statue (+1% Basic Treats) | behind the level 66 gate |
| Vulture Cliff | Withering Potion | Lost Goddess Statue (+1% Stone) | behind the level 64 gate |
| Boulder Peninsula | Magic Drill | Lost Goddess Statue (+1% Wood) | behind the level 56 gate |
| Boulder Plain | Magic Drill | Lost Goddess Statue (+1% Stone) | behind the level 38 gate |
| Volcano Rift | Magic Drill | Lost Goddess Statue (+1% Rolla) | behind the level 62 gate |
| Wild Vale | Magic Drill | Lost Goddess Statue (+1% Raw Ore) | behind the level 66 gate |
| Lizard Isle | Magic Drill | Lost Goddess Statue (+1% Rolla) | behind the level 60 gate |
| Nimbus Isle | Water Mine | Lost Goddess Statue (+1% Battle Essence) | behind the level 38 gate |
| Blissisle | Water Mine | Lost Goddess Statue (+1% Chrono Sand) | behind the level 66 gate |
| Sunset Isle | Water Mine | Lost Goddess Statue (+1% Wood) | behind the level 60 gate |
| Cliff Trove | Gateway Key | Lost Goddess Statue (+1% Raw Ore) | behind the level 46 gate |
| Riskland Trove | Gateway Key | Lost Goddess Statue (+1% Battle Essence) | behind the level 48 gate |
| Vale Trove | Gateway Key | Lost Goddess Statue (+1% Battle Essence) | behind the level 56 gate |
| Lava Trove | Gateway Key | Lost Goddess Statue (+1% Chrono Sand) | behind the level 62 gate |
Aqualis S1
106 zones: 18 main-story regions, each with a Goddess Statue, and 74 side zones with a Lost Goddess Statue. 16 zones are behind a tool: 2 vine zones (Withering Potion), 3 boulder zones (Magic Drill), 6 coral zones (Water Mine), 5 key vaults (Gateway Key); 16 of them hold a Lost Goddess Statue. The 93 gathering spots are on the gathering map with their timers; switch them on below to see where they sit.
| Blocked zone | Needs | Statue | Reached at |
|---|---|---|---|
| Vine Woods | Withering Potion | Lost Goddess Statue (+1% Raw Ore) | behind the level 80 gate |
| Sulfur Woods | Withering Potion | Lost Goddess Statue (+1% Battle Essence) | behind the level 92 gate |
| Boulder Cliff | Magic Drill | Lost Goddess Statue (+1% Chrono Sand) | behind the level 68 gate |
| Boulder Grove | Magic Drill | Lost Goddess Statue (+1% Battle Essence) | behind the level 82 gate |
| Swamp Haven | Magic Drill | Lost Goddess Statue (+1% Basic Treats) | behind the level 84 gate |
| Sweetfin Isle | Water Mine | Lost Goddess Statue (+1% Basic Treats) | behind the level 68 gate |
| Merean Isle | Water Mine | Lost Goddess Statue (+1% Wood) | behind the level 70 gate |
| Mangrove Isle | Water Mine | Lost Goddess Statue (+1% Stone) | behind the level 80 gate |
| Anemone Isle | Water Mine | Lost Goddess Statue (+1% Rolla) | behind the level 88 gate |
| Raccoon Isle | Water Mine | Lost Goddess Statue (+1% Raw Ore) | behind the level 92 gate |
| Beetle Isle | Water Mine | Lost Goddess Statue (+1% Chrono Sand) | behind the level 96 gate |
| Key Vault I | Gateway Key | Lost Goddess Statue (+1% Basic Treats) | behind the level 70 gate |
| Key Vault II | Gateway Key | Lost Goddess Statue (+1% Battle Essence) | behind the level 78 gate |
| Key Vault III | Gateway Key | Lost Goddess Statue (+1% Chrono Sand) | behind the level 82 gate |
| Key Vault IV | Gateway Key | Lost Goddess Statue (+1% Stone) | behind the level 86 gate |
| Key Vault V | Gateway Key | Lost Goddess Statue (+1% Stone) | behind the level 94 gate |
Loong Haven S2
111 zones: 18 main-story regions, each with a Goddess Statue, and 79 side zones with a Lost Goddess Statue. 16 zones are behind a tool: 1 vine zones (Withering Potion), 1 boulder zones (Magic Drill), 2 coral zones (Water Mine), 7 cloud-bridge zones (Cloud Jade), 5 key vaults (Gateway Key); 16 of them hold a Lost Goddess Statue. The 168 gathering spots are on the gathering map with their timers; switch them on below to see where they sit.
| Blocked zone | Needs | Statue | Reached at |
|---|---|---|---|
| Cosmic Ridge | Withering Potion | Lost Goddess Statue (+1% Rolla) | behind the level 110 gate |
| Seal Stone | Magic Drill | Lost Goddess Statue (+1% Raw Ore) | behind the level 128 gate |
| Jadetoad Isle | Water Mine | Lost Goddess Statue (+1% Wood) | behind the level 108 gate |
| Twilight Shoal | Water Mine | Lost Goddess Statue (+1% Battle Essence) | behind the level 114 gate |
| Emerald Isle | Cloud Jade | Lost Goddess Statue (+1% Chrono Sand) | behind the level 98 gate |
| Breeze Cliff | Cloud Jade | Lost Goddess Statue (+1% Wood) | behind the level 104 gate |
| Lightless Isle | Cloud Jade | Lost Goddess Statue (+1% Battle Essence) | behind the level 118 gate |
| Golden Cliff | Cloud Jade | Lost Goddess Statue (+1% Raw Ore) | behind the level 120 gate |
| Frosted Plain | Cloud Jade | Lost Goddess Statue (+1% Chrono Sand) | behind the level 122 gate |
| Fairy Greens | Cloud Jade | Lost Goddess Statue (+1% Battle Essence) | behind the level 102 gate |
| Aether Isle | Cloud Jade | Lost Goddess Statue (+1% Wood) | behind the level 110 gate |
| Iron Latch | Gateway Key | Lost Goddess Statue (+1% Stone) | behind the level 106 gate |
| Keyland | Gateway Key | Lost Goddess Statue (+1% Stone) | behind the level 118 gate |
| Ironpeak | Gateway Key | Lost Goddess Statue (+1% Chrono Sand) | behind the level 120 gate |
| Frontier Vault | Gateway Key | Lost Goddess Statue (+1% Basic Treats) | behind the level 120 gate |
| Frozen Vault | Gateway Key | Lost Goddess Statue (+1% Chrono Sand) | behind the level 126 gate |
Aethyris S3
112 zones: 18 main-story regions, each with a Goddess Statue, and 78 side zones with a Lost Goddess Statue. 16 zones are behind a tool: 2 boulder zones (Magic Drill), 2 coral zones (Water Mine), 2 cloud-bridge zones (Cloud Jade), 5 chaos-crystal zones (Purifying Hammer), 5 key vaults (Gateway Key); 16 of them hold a Lost Goddess Statue. The 246 gathering spots are on the gathering map with their timers; switch them on below to see where they sit.
| Blocked zone | Needs | Statue | Reached at |
|---|---|---|---|
| Paleveil Woods | Magic Drill | Lost Goddess Statue (+1% Wood) | behind the level 140 gate |
| Isle of Plenty | Magic Drill | Lost Goddess Statue (+1% Wood) | behind the level 136 gate |
| Mourning Sea | Water Mine | Lost Goddess Statue (+1% Stone) | behind the level 134 gate |
| Lifeless Vault | Water Mine | Lost Goddess Statue (+1% Basic Treats) | behind the level 146 gate |
| Aerial Vault | Cloud Jade | Lost Goddess Statue (+1% Chrono Sand) | behind the level 132 gate |
| Astral Bounty | Cloud Jade | Lost Goddess Statue (+1% Basic Treats) | behind the level 156 gate |
| Starward Court | Purifying Hammer | Lost Goddess Statue (+1% Wood) | behind the level 146 gate |
| Relic of Rebirth | Purifying Hammer | Lost Goddess Statue (+1% Battle Essence) | behind the level 142 gate |
| The Sundered End | Purifying Hammer | Lost Goddess Statue (+1% Basic Treats) | behind the level 138 gate |
| City of the Void | Purifying Hammer | Lost Goddess Statue (+1% Rolla) | behind the level 148 gate |
| Guardian's Ground | Purifying Hammer | Lost Goddess Statue (+1% Raw Ore) | behind the level 158 gate |
| Treasure of Redemption | Gateway Key | Lost Goddess Statue (+1% Chrono Sand) | no level gate |
| Treasure of Decay | Gateway Key | Lost Goddess Statue (+1% Stone) | behind the level 140 gate |
| Celestial Temple | Gateway Key | Lost Goddess Statue (+1% Rolla) | behind the level 144 gate |
| Sanctum of Rites | Gateway Key | Lost Goddess Statue (+1% Rolla) | behind the level 150 gate |
| Keystone Altar | Gateway Key | Lost Goddess Statue (+1% Wood) | behind the level 154 gate |
Harpadia S4
112 zones: 18 main-story regions, each with a Goddess Statue, and 82 side zones with a Lost Goddess Statue. 14 zones are behind a tool: 2 boulder zones (Magic Drill), 2 coral zones (Water Mine), 5 brick-bridge zones (Brick Switch), 5 key vaults (Gateway Key); 14 of them hold a Lost Goddess Statue. The 173 gathering spots are on the gathering map with their timers; switch them on below to see where they sit.
| Blocked zone | Needs | Statue | Reached at |
|---|---|---|---|
| Secret Factory | Magic Drill | Lost Goddess Statue (+1% Stone) | behind the level 176 gate |
| House of Giggles | Magic Drill | Lost Goddess Statue (+1% Stone) | no level gate |
| Fool's Flats | Water Mine | Lost Goddess Statue (+1% Rolla) | behind the level 166 gate |
| Singing Flats | Water Mine | Lost Goddess Statue (+1% Basic Treats) | behind the level 170 gate |
| Dreamfall Isle | Brick Switch | Lost Goddess Statue (+1% Basic Treats) | behind the level 162 gate |
| Foamdream Beach | Brick Switch | Lost Goddess Statue (+1% Stone) | behind the level 166 gate |
| Riddle Rabbit Isle | Brick Switch | Lost Goddess Statue (+1% Rolla) | no level gate |
| Laughing Isle | Brick Switch | Lost Goddess Statue (+1% Battle Essence) | behind the level 180 gate |
| Drift of Delight | Brick Switch | Lost Goddess Statue (+1% Raw Ore) | no level gate |
| Glee Vault | Gateway Key | Lost Goddess Statue (+1% Chrono Sand) | behind the level 172 gate |
| Curio Heights | Gateway Key | Lost Goddess Statue (+1% Rolla) | behind the level 180 gate |
| Nebula Vault | Gateway Key | Lost Goddess Statue (+1% Stone) | no level gate |
| Treasure Works | Gateway Key | Lost Goddess Statue (+1% Basic Treats) | no level gate |
| Glee Vault | Gateway Key | Lost Goddess Statue (+1% Wood) | behind the level 166 gate |
Ignis S5
110 zones: 18 main-story regions, each with a Goddess Statue, and 81 side zones with a Lost Goddess Statue. 11 zones are behind a tool: 3 ice-barrier zones (Flame Hammer), 3 magma-barrier zones (Frost Hammer), 5 key vaults (Gateway Key); 11 of them hold a Lost Goddess Statue. The 135 gathering spots are on the gathering map with their timers; switch them on below to see where they sit.
| Blocked zone | Needs | Statue | Reached at |
|---|---|---|---|
| Frostfall Cliff | Flame Hammer | Lost Goddess Statue (+1% Chrono Sand) | no level gate |
| Frozen Falls | Flame Hammer | Lost Goddess Statue (+1% Wood) | behind the level 200 gate |
| Frigid Sanctuary | Flame Hammer | Lost Goddess Statue (+1% Battle Essence) | behind the level 206 gate |
| Dragonbreath Pass | Frost Hammer | Lost Goddess Statue (+1% Wood) | behind the level 194 gate |
| Charred Pass | Frost Hammer | Lost Goddess Statue (+1% Chrono Sand) | behind the level 198 gate |
| Ash Courtyard | Frost Hammer | Lost Goddess Statue (+1% Raw Ore) | behind the level 204 gate |
| Snowbound Vault | Gateway Key | Lost Goddess Statue (+1% Chrono Sand) | behind the level 192 gate |
| Ember Vault | Gateway Key | Lost Goddess Statue (+1% Battle Essence) | behind the level 198 gate |
| Winter Vault | Gateway Key | Lost Goddess Statue (+1% Basic Treats) | behind the level 206 gate |
| Entropy Vault | Gateway Key | Lost Goddess Statue (+1% Wood) | no level gate |
| Lost Vault | Gateway Key | Lost Goddess Statue (+1% Basic Treats) | no level gate |
Aeperis Season 6
Aeperis’s map is not read yet: the game’s zone list has it, but its map pack is not among the decoded ones, so there is nothing to draw. Its shop sells the Gateway Key like the others; its own tool and currency have no English name in the game’s files yet.
Where this comes from
The game keeps a list of every zone of every kingdom: its name, its kind (main story, side, battle, puzzle, vault, vines, boulders, coral, cloud bridge, chaos crystals, brick bridge, ice or magma barrier, and so on), its level gate, what it needs to be entered, its neighbours and the bonus its Lost Goddess Statue pays. Each kingdom’s map is a grid, and the zone list says which cells each zone covers; the maps here draw those cells, with the game’s own walkable ground underneath. The statues and the obstacles are placed objects on the same grid, so their marks are where the game puts them.
Each tool’s description says what it clears, and the kingdom shops list the tool, its price and how many each shop level sells. A zone needs a tool when its kind says so or when the obstacle stands inside it. The key vaults are shut by Sealing Pillars; the Gateway Key’s description says it opens sealed stone gates, and a Chinese players’ guide lists the key vaults under it, but the game’s files do not show the key being spent, so that pairing is reported, not read.
Main-story regions carry a level gate; two per kingdom (around regions VII and XIII) have none and open after the next sub-rank promotion instead, which comes from player reports. A side zone’s behind the level N gate is the lowest gate on any path to it from the kingdom’s entrance. Gathering spots are the gathering map’s; the statues page has what each statue gives, and the cart page adds the Lost Goddess bonuses up per season.